In my last post I told you that I had picked up the fabrics to start a new quilt. I've actually come along a good bit on it and today I was sewing together some sashing strips to put between the blocks. The quilt uses batik and cotton and the batik is thinner than regular weight cotton. I was having some problems with the batik fabric coming through on the bobbin side of the seam. So I made a little video to show you what I was doing and what I did to correct it. Hope it helps!

An eclectic mix of knitting, crocheting, quilting, spinning, and adventures of a dynamic mother of five. I enjoy life and pursuing what it has to offer!
Craftsy

Showing posts with label sewing. Show all posts
Showing posts with label sewing. Show all posts
Sunday, October 23, 2016
Tuesday, May 26, 2015
Do you have 8 seconds?
As I was trolling through Facebook the other day something caught my eye. Humans now have an attention span of 8 seconds. Which is a second less than a goldfish. It took me about 7 seconds to read those first 3 sentences. Which also means if I don't "catch your attention" in those first three sentences my chances of you hanging around for the rest of this post are fairly slim. You still here? Good.
I like social media. I genuinely like connecting with people all around the world. Facebook is mostly friends and family, but I also have multiple groups where I connect and make friends with people I normally would never talk to on the street. Twitter is boring to me, but give me an hour or two of Pinterest any day! And why is this? For the reasons I listed above. We're distracted to the point where most of us are running around in a daze and checking our phones 150 times a day. I'm just as guilty of it as anyone else. Shoot, some days I have to force myself NOT to check Facebook instead of reading my Bible study or immersing myself in a good book.
That's also why I think so many of us no longer engage in the arts. We want a quick fix - like those handy tips we find on Pinterst - and to start selling our products which may or may not be sub par to someone else's because we actually took the time just to make it, not perfect it. Maybe we don't want to sell, but instead we want to just make something quick for a dinner party or a little decor in the house. However, very few people have enough concentration and determination to become very good at something.
When was the last time you thought to yourself, "Hey, I would really love to learn how to ______" (fill in the blanks here) but then started thinking about all the stuff involved in learning that skill. Those things then pile up and you just throw your hands up in the air and walk away? Or maybe you have a craft room (desk, cupboard, area) full of supplies for projects you started, and never finished? Sound familiar?
My friend and I were talking about this the other day. And it sent me on a journey of thinking long and hard about why I do these things myself. I get bored repeating the same thing over and over. If I hit a plateau where something is about as good as it gets or has very little left to learn, I leave it behind. So I learn something new. There really is nothing wrong with that, because I do continue to do something until I have exhausted its potential to awaken my mind. I work hard and plod away at things (self-taught knitter, crocheter, spinner, quilter here) until I learn them. I definitely have an attention span longer than 8 seconds when it comes to pursuing a new craft.
Many of us do not, though. If it takes more than an hour or two to learn, I think many of us will just cast it aside until we have the time. And usually, we will NEVER find the time. I mean, there are a lot of 8 second occurrences throughout the day, right? Things are constantly vying for our time and attention, and the less we spend on each one, the more we can get done throughout the day. It's ok, I get it.
Now I know that this has taken wayyyy more than 8 seconds to read, and for that I am truly sorry. If you have made it this far, I feel quite honored! My whole point of this blog post, though, is that crafting can help us get back to a more reasonable form of concentration and a longer attention span. When I took up spinning I did not realize the level of concentration it would take not only to learn it, but to continue practicing it. Every length of fiber needs to be checked for uniformity. Yes, I know there are art yarns. I don't like them. I don't make them. That's a post for another day. So I can listen to audio books (yay audio books!), but watching a movie or anything that takes my concentration away from the actual process is a challenge and my levels of accuracy fall drastically.
I can knit and crochet while watching television. Yes, I can even talk and carry on a conversation as long as I am not counting something or following a chart. A vanilla project could even be worked on in church with my full attention on the pastor (if I was ever brave enough to do such a thing) and still hear every word he says. When my hands stay busy, my mind stays engaged.
Engaging your mind and increasing your attention span will also help you in other areas of your life. You will miraculously remember your friend's favorite color or your spouse's birthday because you listened to them - and not just because Facebook reminded you. You will engage in conversation verbally. Your mind becomes sharper and you may even be able to drive without running a light, forgetting to use your blinker, and turning without the assistance of a GPS.
My challenge to you is to try it. Pick something, anything, that you have wanted to learn how to do (woodworking, knitting, crochet, spinning, scrapbooking, quilting, gardening) and do it. Don't think about what it will take to do it. Do NOT think about the hours you do not have to learn it. Just do it. And this is encouragement for my friend, as well. Turn off your phone, your notifications, your computer, the television, or take a vacation day. Whatever it is that distracts you, remove it. Life will go on while you learn, and think of how much fun it will be to check all of those posts and likes when you do return to social media. You'll also find out how little there is to care about on social media.
Or you could miss what Sally had for dinner that day...tragic, really.
Thursday, March 20, 2014
Sewing on Thursday: Sewing Skill Builder Part 3
For part 3 of our sewing skill builder, we're going to make 2 additional pockets for our sewing basket. These pockets will be the couching sampler and the puffing sampler. Samplers 1 & 2 can be found here.
Materials for puffing sampler:
 |
| Puffing sampler on left, couching sampler on right |
1 piece of copy paper
1 - 5"x 8" piece of fabric
1 - small scrap contrasting color for ribbon center
1 - flower or design of choice iron-on applique (sew on work too)
1 - 1"w x 45"l strip of fabric
1 - piece of newsprint or lightweight tearaway stabilizer
1 - yard Belgian lace, ribbon, or cording


Baste the piece right to the paper or stabilizer. Make sure it is where you want it, then zigzag stitch around all of the edges. Remove the paper from the puffing piece. If you use a tearaway stabilizer you can leave the section behind the fabric attached. I left my copy paper on, although I think it was much too stiff afterward.
 Pin and baste your puffing piece to your 5" x 8" background fabric. Zigzag around the edges. It is okay to sew over where it crosses.


We will begin with the puffing sampler. To start, you will need to draw a 5"x 8" rectangle on a piece of paper. Regular copy paper will work just fine.
Draw cross hairs across the center length and width of the rectangle. The book instructs us somewhat vaguely to "Refer to photograph on page 6 for pocket design. Draw and cut from paper the shape to be puffed." Which is probably why not a lot of people pick up these older books. They are too assuming that you know what they are talking about! The shape they reference is the upside down "awareness ribbon" (that's my name for it). Start by centering and drawing a teardrop shape in the middle of the cross hairs.
Center your flower applique on the middle of the teardrop to make sure there is plenty of space.
Finish drawing the ribbon shape by making sure that your ribbon width is no more than 1" wide. I actually drew mine around 7/8" to accommodate the fabric strip we'll attach later. Cut out your shape.
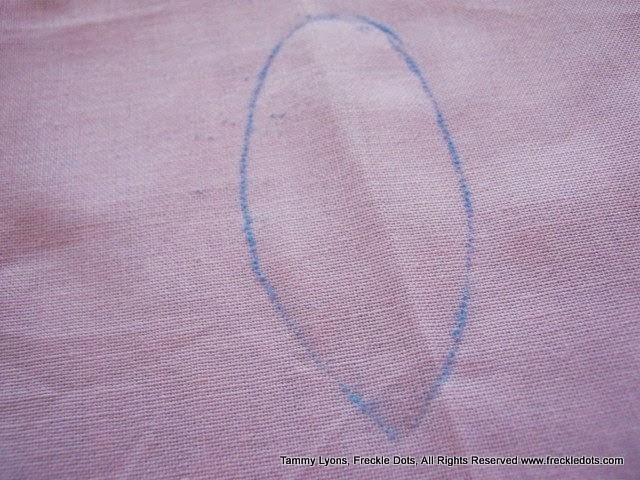
Pin the shape to your 5" x 8" background fabric, in my case the yellow with white polka dots, and using a water soluble marker or a Chaco pen, trace around the outline of the shape, including the middle.
Remove the pattern and place it on your contrasting color of fabric. Draw the center of the shape ONLY on the contrasting fabric.
Cut around the shape at least 1/4" larger than your marked lines.
Pin your teardrop shape to the center of the 5x8 fabric, using the outline of the shape you drew as a guide. Baste it to the background fabric using a long stitch. This helps make sure it stays in place! Then iron (or sew) your applique to the center of your shape.
Do a final zigzag stitch around the entire tear drop shape to secure it in place and seal the edges.
Now we're going to work on the actual puffing piece. Draw another copy of you shape onto a new piece of paper. I found that copy paper does not tear off very well and that it is good idea to use lighter weight paper like newsprint or a thin tearaway stabilizer for this part. Do not cut the shape from the paper.
Gather the 1" x 45" strip of fabric by using a basting stitch and sewing down both long sides of the piece. Tie the thread ends on one short end and carefully pull the bobbin threads on the opposite end so that the fabric starts to bunch up on itself. Continue to bunch and move fabric toward the tied end, until it is as bunched as you want it.
Arrange your puffed piece on the outline of the second shape you drew. You can adjust the gathers to fit the shape. Once you have it where you want it, pin it in place.
The book suggests using Belgian lace to cover the zigzagged edges. I couldn't find any I really liked, though, so I used a strip of satin ribbon instead. I pinned the ribbon in place, covering the stitches, then sewed along the inside and outside edges of the ribbon. Mine was 1/4" ribbon. You could probably go 3/8"without encroaching on your applique.
Couching Sampler Materials:
1 - 5" x 8" piece of background fabric (dots again!)
1 - piece of tear away stabilizer
cording, ribbon, thread, and materials of different thicknesses
1 - thread colors of your choice
On your piece of background fabric, mark diagonal lines in both directions. Vary the distances between your lines.
Place your stabilizer under your fabric and lay a piece of selected cording over one of the lines that you drew. Using a zigzag stitch, center your presser foot on the cording and sew over it. You can adjust your zigzag width to accommodate the thickness of the cording (usually).
Continue sewing different cords, ribbons, and threads across your lines, adjusting your zigzag stitches as necessary. I used some metallic cording, pink cording, and doubled-up pieces of embroidery thread.
Trim the edges of your cording so that it is even with the edges of your swatch.
I hope you got some good hints and tips during this session. If you missed any of the previous sessions please click the link in the sidebar for Thursdays. You'll see them all lined up there!
Monday, March 3, 2014
Crafty Monday: Make a Sewing Basket
In our Sewing Thursday series we're making pockets from samplers intended for a sewing basket. But what if you don't have a sewing basket or something nice to hang your pockets from?

Let's make one!
To make your sewing basket you will need:
Materials:


Then lay four more sticks on the remaining sides, overlapping the ends. Place a dab of glue on the ends of the sticks to attach them once you think they're fairly even. *Start with the sticks facing in along the fold lines of the octagon so that they meet in the middle, then lay your sticks around the edges. The book has you do this at the end, building your bottom after the basket is made. I think by laying them first, you'll have a better chance at getting them even.
This will take you a while. I suggest turning on a good movie or audio book and getting into a rhythm. Work until your basket measures the height you want it. For our pockets, we'll need about 7-8". However, I only made mine about 5" tall for the demonstration.
Now to build your lid. Without gluing it down, add a layer of sticks to your last layer. Glue another layer of four sticks to this layer and start building up, continuing to offset your sticks inward and making the top smaller. *Put a piece of paper, a pencil , or some other object between the layers of the main basket and the lid once they have dried slightly so that you can see where it begins and ends.
Let's make one!
To make your sewing basket you will need:
Materials:
- Popsicle sticks (about 400 or so. Just get a big box of them. You'll use them again.)
- School Glue (I used the Glue All type)
- A wooden block or knob for the top (you can find these in the wood section of your craft store or you can get really inventive and use other items. Just make sure you can glue it to your box.)
- A large piece of paper
Crafting Time: Approximately 3-4 hours
I wish I could take 100% credit for this idea, but I can't. I got it from the Big A** Book of Crafts by Mark Montano. I did, however, make it and will suggest some changes varying from his instructions, as they were slightly confusing and a little vague. I haven't re-made the basket yet because my kids discovered my sticks and glue and went to town, but I have marked these suggestions in red if you'd like to try them and see if they will work.
To begin working your basket, make an octagon from your paper with 5.5" outside edges. There were instructions in the book on how to do this by folding a piece of craft or newspaper, but they were confusing to me. I'm not a paper crafter, so it was hard to figure out and I ended up cutting the wrong side or something. Anyway, you can see where I taped it back together. If I'd followed THESE INSTRUCTIONS I may have had more success.
So if you successfully wrangled your base out of paper, it's time to lay out the sticks. Start by laying four sticks on opposite sides.
 |
| first layer, make sure your angle are even |
 |
| Suggested layout |
Now start building up your layers by gluing the sticks on opposing sides. Kind of like building a log cabin where they are layered in a criss-cross manner.
 |
| building up the layers |
When you've reached the height you want it, start layering your sticks so that they are offset by about 1/8" and moving toward the inside. As you glue these next layers, your sticks will start to have longer ends and you'll need to move your glue areas in a bit. This creates a nice structural effect on the basket and makes the top look like a very nicely carved piece of wood. It also creates a nice lip to hang things from. *You could get even more creative here and make your sticks look like the top of a vase, moving them first in, then back out.
 |
| Start offsetting the sticks toward the inside |
 |
| Another view of the offset toward the inside |
Work your lid until you have an area small enough to lay your sticks across it in a straight line. I found that with the 1/8" offset, this took about 4 more layers than suggested in the book. Remove the top from the basket and finish on another piece of paper or newspaper.


Lay the sticks from one side all the way across to the other side. Fill in the opposing sides laying sticks in the opposite direction. Add a layer of sticks from two of the remaining sides going across the first layer and filling in the empty triangles, then fill in the remaining two sides as you did previously.
And now you have a sewing basket! If you follow my suggestions or have a better way of doing this, please comment below or upload some pictures to our Flikr group. You could also paint it. I like the wooden/wicket look of the basket, but I may paint it white. Show me your baskets!
*Lay your sticks so that you have a square.
*Lay sticks on top of each other to even out the layers and create an area where the ends of the sticks will overlap the edges and have something to grab onto.
Make a layer straight across the top,closing up the hole.
To finish the top, glue the wooden block or your chosen handle to the top and allow it to dry.
To make the bottom as described in the book, lay sticks along the folded edges of your paper and glue to the empty area under the second layer of the base. If your main basket is dry enough and you're feeling adventurous, you can flip it over and go without the paper.
Lay the sticks from one side all the way across to the other side. Fill in the opposing sides laying sticks in the opposite direction. Add a layer of sticks from two of the remaining sides going across the first layer and filling in the empty triangles, then fill in the remaining two sides as you did previously.
I do suggest laying these first though, as described above. I actually think it would make more sense to lay out the bottom of the basket first, layering the cross members along the seam lines, then laying sticks in one vertical and horizontal layer, then repeating in the opposing directions so that you have a base to work from. I think that making the square would allow for more precision in making sure that the edges and angles were even.
 |
| See how there were gaps between the sticks with this method? :( |
 |
| I had to make accommodations for the gaps by layering a couple of the sticks off center. |
 |
| Also added additional sticks for the cross members so I had something to attach the sticks to |
And now you have a sewing basket! If you follow my suggestions or have a better way of doing this, please comment below or upload some pictures to our Flikr group. You could also paint it. I like the wooden/wicket look of the basket, but I may paint it white. Show me your baskets!
Thursday, February 27, 2014
Sewing on Thursday: Sewing Skill Builder 2
Sorry about the delay in our "weekly" sewing skill builder. Circumstances beyond my control have made posting difficult the last couple of weeks! To make up for it, we'll do two a week starting next week so we're not too far behind. So without further delay, let's dig right in and get started on this week's skill builder!
 We're working on our openwork sampler this week. This sampler employs some age-old techniques of removing part of the weave in the fabric to open up the other fibers running in the opposite direction. It takes a good piece of open weave fabric to work with, but it can make some lovely results.
Materials:
Cut a 5" square of your loosely woven fabric and mark a 1.25" horizontal band in the center. I did this by first finding my center, then marking 5/8" on either side of that. Pull out a thread at the top and bottom of the band. Here you can see where I used a seam ripper to loosen the threads along the marks.
Sew along the lines where you loosened the two threads. Now pull out all horizontal threads between the stitched lines.
Using a narrow zig-zag stitch (practiced in our first skill-builder) and lowering your feed dogs, sew along the vertical lines that are left. Pull some together, adding in and removing sections as you go. You can move from top to bottom and bottom to top to get your variations. (Just a note here, I forgot to lower my feed dogs until I had sewn the entire thing. I went back over it and lowering the feed dogs makes it much easier.) If you don't know how to lower them in your machine, please consult your owner's manual. On the Janome, there is a switch on the right-hand side that lets you easily lower them. You may also want to use a foot such as the "F" foot on the Janome that easily glides over the fabric but also allows for a zig zag.
Once you have completed sewing the cords on the band, place a piece of paper behind the open area. I used freezer paper and ironed it to the fabric. Zig zag stitch across the top and bottom of your open area band and remove the paper.
Trim 3/4" off the top and bottom of your openwork and then turn under 1/4" on the top and bottom. Place openwork piece 1" from bottom of 5x8" piece of fabric and stitch along the top and bottom of openwork piece where you turned the seams under.

Materials:
 |
| Make sure your open weave fabric has obvious warp and weft threads you can remove |
- 5" Square of loosely woven fabric
- Red thread (or color of your choice)
- 1 - 5x8" piece of fabric
- 1 - 2x5" piece of fabric
- seam ripper
- stabilizing paper
Cut a 5" square of your loosely woven fabric and mark a 1.25" horizontal band in the center. I did this by first finding my center, then marking 5/8" on either side of that. Pull out a thread at the top and bottom of the band. Here you can see where I used a seam ripper to loosen the threads along the marks.
 |
| Loosen the threads using a seam ripper or similar object |
Sew along the lines where you loosened the two threads. Now pull out all horizontal threads between the stitched lines.
 |
| Sew along the loosened thread lines |
 |
| Sew over vertical threads |
 |
| First pass with feed dogs up |
 |
| Second pass with feed dogs lowered |
 |
| Back of openwork with paper removed |
Carefully cut out main fabric from behind the openwork fabric. Place the 2x5" piece of red fabric underneath the band area with the right side facing up. Pin and topstitch along the fold lines of the openwork piece.
My openwork ended up a little wonky, but I'm not too worried about it because it will be cut and shaped when we finish the pockets anyway. Remember, these are practice samplers and you can change them up or use them however you want.
 |
| Finished piece with contrasting fabric behind openwork |
Thursday, February 6, 2014
Sewing On Thursday: Sewing Skill Builder Part One
This week also starts our sewing skill builder! Yep, that's right. We have a Block of the Month and a sewing skill builder. I've been pretty busy at the machine. Not to mention, I also have 2 quilts in the works!
Ok, so part one!
This first bit is actually pretty easy, but it will give you a chance to play with your machine's zig zag settings a bit. I think this is a function modern sewists sometimes take for granted, but the zig zag function wasn't available until Helen Augusta Blanchard patented it in 1873, 27 years after the sewing machine's first patent by Elias Howe. It wasn't really common to have a machine that could both zig zag stitch and straight stitch until the early 1900s. Even then it took a special gadget to perform the function. Today's machines are electronically or mechanically equipped with a zig zag function built in.
Therefore, behold the zig zag!
Materials:
One 7x12" piece of fabric
Thread
Stabilizer, freezer paper or piece of copy paper
For my sampler I chose shades of yellow and pink. I'm not big on off-white, but think the fabrics I chose have a vintage flavor to them.

Since I changed out the colors of the fabrics, I also wrote a little sticky note to myself on the book with the colors I'm using in exchange. .

So for our zig zag sampler, you may want to iron on a piece of lightweight removable stabilizer or freezer paper or put a piece of typing paper behind it. This helps to keep the fabric from bunching up. I used freezer paper because it irons on easily and peels right back off.
Keep the long side to the top and sew the zig zags spaced evenly apart, but leave enough room to run a line of straight stitching between them. Vary your zig zag widths, but try to leave the stitching distance about the same. We want a nice close line of satin stitching.

Once you have sewn your stitches, take the fabric over to the cutting mat and cut a 2" strip off of both sides. Your center piece should be about 2.75" wide. Take the center strip and turn it upside down.
Sew your sides back on to the center strip.

You now have the front of your first pocket piece. In later sessions we'll be shaping and sewing them all onto a backing and actually making the pockets.
Next week we'll discuss making an openwork sampler pocket. For this you'll need a piece of loose weave fabric along with your other fabrics. I used a piece of burlap, but you can choose something else, as long as it has a loose weave where you can pull threads from. Until then, happy stitching!
Ok, so part one!
This first bit is actually pretty easy, but it will give you a chance to play with your machine's zig zag settings a bit. I think this is a function modern sewists sometimes take for granted, but the zig zag function wasn't available until Helen Augusta Blanchard patented it in 1873, 27 years after the sewing machine's first patent by Elias Howe. It wasn't really common to have a machine that could both zig zag stitch and straight stitch until the early 1900s. Even then it took a special gadget to perform the function. Today's machines are electronically or mechanically equipped with a zig zag function built in.
Therefore, behold the zig zag!
Materials:
One 7x12" piece of fabric
Thread
Stabilizer, freezer paper or piece of copy paper
For my sampler I chose shades of yellow and pink. I'm not big on off-white, but think the fabrics I chose have a vintage flavor to them.
Since I changed out the colors of the fabrics, I also wrote a little sticky note to myself on the book with the colors I'm using in exchange. .
So for our zig zag sampler, you may want to iron on a piece of lightweight removable stabilizer or freezer paper or put a piece of typing paper behind it. This helps to keep the fabric from bunching up. I used freezer paper because it irons on easily and peels right back off.
Keep the long side to the top and sew the zig zags spaced evenly apart, but leave enough room to run a line of straight stitching between them. Vary your zig zag widths, but try to leave the stitching distance about the same. We want a nice close line of satin stitching.
Once you have sewn your stitches, take the fabric over to the cutting mat and cut a 2" strip off of both sides. Your center piece should be about 2.75" wide. Take the center strip and turn it upside down.
 |
| cut 2" off sides |
 |
| turn middle section upside down |
Sew your sides back on to the center strip.
You now have the front of your first pocket piece. In later sessions we'll be shaping and sewing them all onto a backing and actually making the pockets.
Next week we'll discuss making an openwork sampler pocket. For this you'll need a piece of loose weave fabric along with your other fabrics. I used a piece of burlap, but you can choose something else, as long as it has a loose weave where you can pull threads from. Until then, happy stitching!
Subscribe to:
Posts (Atom)
Craftsy

LinkWithin
