Welcome!

I craft! Spinning, sewing, knitting, quilting...it's all here, along with so much more. I just love making things and writing about them. I hope you'll join me.

Craftsy

Craftsy

Search This Blog

Showing posts with label crochet. Show all posts

Wednesday, January 14, 2015

Cupboard Door Knob Backplate

It's my first legit crafting post of 2015! I have decided that THIS is the year that I will finally decorate in the shabby chic manner that I so love. This means lots of little crochet pieces and a blog filled with shabby stuff. So I hope you're prepared!


The first thing I wanted to do is fix the paint chipping off the cupboard doors behind the knobs in the kitchen. I have looked at many different backplates for this solution, but nothing really struck my fancy. The ones that did were too pricey for the amount I needed, too!


So I decided that I would try to crochet some lace doilies and use those as backplates. The biggest challenge was trying to find a small enough doily pattern to use. I only had about 3" of room. I finally decided to just look at the center of some larger doily patterns and chose Curlique from the book Irish Lace Doilies on e-patternscentral.com. I just made the first 4 rounds, which, as indicated in the pattern, would measure 3" perfectly.


It took me a couple of nights, but I made the first 7 to go on the upper cabinets, where the chipping was the worst. First, I removed the knobs and repainted the chipped areas after a light sanding. After that was dry, I starched my doilies using a 1/2 white glue, 1/2 water ratio and letting them dry after blocking.


Once they were dry I applied them to the cupboards using Loc-tite Crafter's Indoor Safe Adhesive. It is non-yellowing, acid free, and low odor. It also says it is water resistant after curing and creates a permanent bond. This was exactly what I wanted.


So what do you think? I think that crochet can be used in so many different ways. All it takes is a little ingenuity. On my way to glorious shabbiness.


Thursday, September 18, 2014

Craftsy's Big Fall Course Sale

It's that time again! The time for hot cocoa, crisp and cool mornings, walks along paths littered with colored leaves, and knitting. If you're lucky enough to live in one of the cooler climates, you can knit by the fireside or bundled up in a blanket. Or maybe you like to sew, decorate cakes, crochet, and a variety of other crafts to keep you occupied on those chilly fall and winter days. If not, but you've always thought you might like to learn, now is the time!


Craftsy
Craftsy's BIG Fall Course Sale!
(sponsored post)

Have you heard Craftsy's BIG Fall Course Sale is happening now? Learn from the world's best instructors in the comfort of your home, when you shop up to 50% off ALL online classes! Once you enroll you can watch your classes anytime, anywhere, forever. Hurry, offer expires September 22, 2014 at 11:59 PM MT. Shop Craftsy's BIG Fall Course Sale and save.

You can never go wrong with a Craftsy class. Great for watching on those days you just want to be creative, or any time you feel the need for more crafting. Get inspired! 

Thursday, August 14, 2014

ANOTHER way to purchase patterns and online marketplace

I just found a really cool site called Store Envy. I've been playing around with it for the last couple of hours, knowing dang well I should be doing something else. But I've been trying to move away from Etsy and their fees and find other online marketplaces for my patterns and goods. The more the merrier, right?

Anyway, here is my link for Store Envy


Visit my store on Storenvy


You can also find it in the side bar. Payment is through Paypal, and as always, shipping is free on patterns. I will add more to it later including the baby blankets and additional patterns. 

Wednesday, August 13, 2014

New way to buy patterns

Good afternoon! As per my last post you know I'm shutting down my t-shirt quilting business for a while. However, I'm moving into improving and building up my crochet and knitting patterns. I recently enrolled in a Craftsy class called Lace Shawl Design. I'm learning a lot and watch it when I get a chance. Since I've gone back to work part time my chances aren't as many as I would like, but that's what Craftsy is all about! Whenever, wherever, and however long it takes. Have I mentioned I love Craftsy?

Anyway, I wanted to let my readers know that there is a new way for you to purchase my patterns right through this blog. As I build up my library, I want to offer all of the options I can. So now, by clicking on the link at the top that says, "Crochet and Knitting Patterns" you will be taken to another page in this blog. There, you can purchase directly from Payloadz.com where I upload my patterns for safe-keeping. Downloads are immediate and payment is secure.

If you would still like to purchase from me on Etsy, Craftsy, Zibbet, or Ravelry please feel free to do so! This is just another way for me to offer you an option.

I thank you for your support and hope to bring you much more in the coming months. 

Thursday, June 12, 2014

Why Pattern Designers Should Sell on Ravelry or Craftsy

Do you design knitting or crochet patterns? Have you ever tried to sell your patterns? What outlet do you use to sell your patterns through?

If you said Ravelry or Craftsy, you're up there in the top percentage of very smart and thrifty designers! Ravelry has been around since May 2007 when Casey and Jessica Forbes decided to found a social networking site that allowed fiber artists a place "...to keep track of their yarn, tools and pattern information, and look to others for ideas and inspiration." (Wikipedia, "Ravelry." 28 February, 2014.)

In comparison, Craftsy has only been around since 2011 when it was launched by Sympoz (former eBay execs John Levisay and Josh Scott) but had over a half million enrollments in its first year. (Wikipedia, "Craftsy." 24 November 2013.) Craftsy is popular for their video tutorials teaching people various crafts such as sewing, quilting, knitting, crochet, cooking, and painting. But did you know they also have a ton of patterns released by independent designers? Everything from sewing to crochet and knitting? Did you also know that it is free to sign up, free to sell, and you keep your profits? http://www.craftsy.com/pattern/sell

Neither Craftsy or Ravelry charge fees. Ravelry gives you up to $30 in sales a month before they charge anything, and then it is only a very small fee. Craftsy makes the explicit statement that it is your pattern, your design, and they do not take any of your profits. To make a long story short, Craftsy and Ravelry allow me to keep most of my profits (there is always the Paypal factor) but I lose out big on Etsy! If you want a break down, read on.

Now why am I saying all of this? Because I am also a vendor on Etsy. I sell my patterns there. To sell my patterns, I have to pay a $.20 listing fee, then another 3% +.25 if they are buying through direct checkout. If they buy through Paypal, I lose an additional .5% on Etsy then 2.9% + .30 on Paypal. So if I sell a pattern for $2 on Etsy, it costs me $.57 ($.06 is 3% + $.25 + $.20 listing fee) just in fees, making my grand total of profit $1.43. If I sell through Paypal, I lose an additional $.31. This takes my profits down to $1.12 Etsy and Paypal are collecting a tidy little profit off of me at this point. 


Now granted, if I sell through Craftsy and Ravelry I will still lose a portion of my profits through Paypal. I have a business account on Paypal, so my fee drops down to 2.2%. Which is only $.04. I can handle that. I would rather lose $.04 than $.88! Now, I know I'm going to lose out somewhere along the way and I can't make 100% profit, but the alternatives to selling on Craftsy and Ravelry seem better to me than paying Etsy!


 I'm not an Etsy hater. In fact, I adore Etsy and credit their venue for providing 90% or more of my sales. I can sell through Craftsy and Etsy at the $2.00 rate and still make $1.96 on each of my patterns because they don't charge fees for selling. But on Etsy, I have to charge $2.50 - $3.00 for those SAME PATTERNS just so I can make close to the same profits. 


I'm not going to go into the details of what is involved with pattern writing and production right now, but unless I sell A LOT of patterns, I won't become rich or supplement my income in doing it. I basically do it because I like to and can make a little change here and there. Ravelry and Craftsy are two of my favorite selling venues. If you're looking to sell your patterns online, try out one or both of these sites and see what I mean.

*Disclosure: I am a paid affiliate for Craftsy.com and will make a small commission from sign ups generated through clicking on these links. However, all opinions expressed and recommendations are based on my personal experiences. I do not sell for vendors that I do not use or have experience with. 

Tuesday, February 11, 2014

Tuesday Knitting: Knitting is an Olympic Sport on Ravelry

The Sochi Winter Olympic Games are in full swing for 2014! While countries around the world are cheering on their prized athletes and taking home medals, those of us not in the Olympics or athletically inclined may be wondering how we could win our own medals. Everyone has a skill of some kind, and for some of us it is crochet, knitting, or fiber work of some type. Ravelry has your solution!
My 2014 Entry!

Ravelry hosts the Ravellenic Winter Games in which knitters, crocheters, and other fiber workers can find their niche in their Olympic "sport." And of course one of the big stories in the needlework arena is that of the Finnish Snowboarding Coach Antti Koskinen knitting at the starting line. It even made it to Buzzfeed and is all over Facebook. So why not have it as a game?

So what are Ravellenics? Honestly, I hadn't even heard about them until this year. Never being very active on Ravelry until this year, it's not surprising that I missed it. The Ravellenics are a series of events that fiber artists can enter to set a personal goal of finishing. Everything from cables and lacework to finishing up UFOs can be entered. They even had a classification for things that don't fit into other categories. Basically, you chose a project, enter it into your project gallery, and tag it with Ravellenic tags to enter. If you can finish by February 28 (the end of the Olympic games) you get a medal. Pretty cool, huh?

I entered this year, hoping to finish a cabled shell that I've had my heart set on. I started on opening day, then ripped it out to start over again last night. I know I only have 17 days left now. I'm a little worried. But hoping I can pull this one off! If not, there's always next year. Setting a personal goal is fun and challenging!


If you'd like to give it a try, find out more and a list of events on the Ravelry Ravellenics group page. You can enter with a team you already have or go it alone. It's a good way to have fun with your groups or stay on a project you'd like to complete. All in good fun!

Tuesday, February 4, 2014

Tuesday Needlework: Using Crochet in Sewing

Crochet in all of its variations was traditionally used to make lacy items that women then added to clothing and accessories. Over the years it developed into doilies and bed spreads, clothing, and much, much more. I didn't learn about thread crochet until I was about 19 and saw a beautiful Barbie Doll wedding dress in an issue of Crochet World. My first lessons in crochet had used worsted weight yarns to make afghans and later on bed doll dresses. I wasn't taught the nuances of correct gauge and yarn weights or that there was so much variety for this form of needlework. Once I started buying these magazines, though, I realized the possibilities were  nearly endless.
I mentioned in an earlier post that I honestly believe there are uses for crochet that are more appealing than others. I don't care for crocheted clothing. But I DO love the look of crochet in other applications. I also like to go back to the roots of an intended use for a technique. So when I was planning the skill-builder sewing series I decided I would also make some of the lace accessories used in the patterns. Unfortunately, it's hard to actually find some of the materials because the book is more than 20 years old. Which also justifies making them.
For the pincushion we need a 4" crochet doily as an applique. You can find these in some craft and sewing stores or online, but it is difficult to find the right size. My best argument for creating my own is that I know where my labor is sourced from.
I used e-patternscentral.com to find my doily, but a web search would also turn up some really great patterns. I used pattern #13 from the book Miniature Doilies. This is what I ended up with! It took me about 1 hour to finish, which I did while waiting on my kids to get their teeth cleaned. Good way to spend a dental visit.
Doily #13
Doily #13
We'll be discussing making entredeux on our next Friday Tutorial. Entredeux is French for "between two" and when used in sewing is a bit of lace or decoration that goes  between two pieces of fabric for stability. I hope you'll join me in learning how to make this beautiful traditional decoration and for our Skill-builder sewing series.

Tuesday, January 28, 2014

Tuesday Needlework: Yarn Bombing

Obviously I knit and crochet. Obviously I love yarn and many things made from it. I think it is an art form that some master with skill. I find value in wool, cotton, and natural materials gathered, spun, dyed, and distributed. Obviously I think yarn bombing is the biggest waste of time, energy, talent, and yarn that ever existed. Yep, I said it. It's a waste. I'm a huge fan of art, too. Creating it and distributing it and appreciating it. In a wide variety of forms. But to me, yarn bombing is a desperate cry for nothing better to do with one's time than make tubes to tie on trees.

It looks terrible. Nature can never be improved in any way by knitting something to put on it. And defacing someone else's art (statues, sculptures, etc.) by putting YOUR yarn on it is sacrilegious. It irritates me in ways I can't even explain. Especially when I see these long works that took hours to make (and who knows how much wool and/or polluting acrylics) draped over some bush in the park, doing nothing more than interfering with natural beauty and wildlife. And why in the world would it make any kind of a statement to cover a bridge in yarn? The whole thing just grates on my nerves and I want to scream, "DO SOMETHING GOOD WITH YOUR TALENT! If you want to use up yarn and time, do it for a good cause!"

Then, I seen this:

My Facebook was blowing up with it! Not only was it being shared by every single knitting group that I like, but my friends were also sharing it. According to CTVNews this yarn bomber was leaving notes attached that said to "take the scarf it you need it!" Wow. I'm already impressed. No name was associated with it, just a good Samaritan. THIS was impressive. THIS was important. THIS was worthwhile. 

I run an organization called Warm up the Boro. I collect and make hats and scarves to donate to the needy in our community. I've been doing it for a little over a year now, and we just had our first distribution. It's been difficult to get donations locally, so I have some plans to try and expand it. BUT! I wish you could've seen the faces of those that got their new hats this past weekend. Many were overjoyed and enormously thankful. 

Donation day. We had already given out a bunch of hats!

Part of our collection! 
No, I didn't yarn bomb, but I can see the potential in this! Whoever did this doesn't care what your circumstances are, here is a free scarf. This was done with intent and purpose and a great outcome. 

Now, before someone jumps down my throat about my OBVIOUS hatred of yarn bombing, let me say that I DO know that some of these other works are donated to shelters and such after the bombing. That's great. I really can't say anything bad about that. My distaste comes from those that just leave it. I've never met a fire hydrant that needed a scarf. Not. One. Although a dog could probably see some wiping value in it. 

Now about knitting and crocheting food...

Monday, January 27, 2014

Crafty Monday: Time Management Fail

Right here should be a really awesome blog post about making a closet in a weekend. Yep, that's what I had planned. Unfortunately, it didn't happen. Things just didn't come together, I didn't have the right materials, and I spent my Saturday doing something else. Not that I would've done anything differently on my Saturday, but it was just one of those projects where I had an idea, thought it would work, but nothing. Nada. Zip.

I got one part of it done, but it took me most of the day on Sunday. By the time I wanted to finish it, Sunday was nearly over. We were also dealing with two sick children. I also run a charity similar to Warm Up America, but I try to keep it local. It's called Warm Up the Boro and if you're interested, please stop on by our Facebook page and check us out. I spent most of the morning handing out hats and scarves to those that didn't have any at our local soup kitchen. It was so much fun, and such a blessing. Little kids walking out with warm hats that they didn't have previously, and adults that wore theirs the entire time they were there. Even here in South Georgia it's been very cold and the wind chill has been killer. It took a year's effort and many donations to make it happen, but it did. If you follow anything about knitting, you probably saw the scarf on the statue last week? I think that should be up for "Best Possible Use of Yarn Bombing EVER!"

The post that should've been here, that isn't, should be by next Monday. I did put forth good effort. But, things happen I guess. And it gives me fuel for tomorrow's Knitting Tuesday post. :) 

Thursday, January 23, 2014

Sewing on Thursday: An armrest sling for crafty projects

I have a mess in my living room. It's not from the kids, or the dogs, or even the husband. It's me. All mine. It's globbed up in piles in various areas. I have organizers and bags filled to the brim with tools and accessories, yet none of them seem to be able to give me the rapid availability I require for my projects? It's a conglomeration of yarn, threads, sewing needles, knitting needles, crochet hooks, patterns, scissors, stitch markers, and coffee cups.
Try as I might to keep it tidy, I get back in there at the end of the day and start working on my projects. Before long, everything is right back out again. After 2 days, I've given up trying to put it away when I'm finished with it, because rarely is there a point where I say, "Ok, I'm done for the night." Nope. What usually happens is that I work up until I send the kids to bed around 8. Then we go in, read or tell stories, say goodnight prayers, and drift off to sleep. Yes, me included sometimes. They're just so warm and snuggly. It's difficult.

I want all of my tools right where I can easily grab them, without having to undo an organizer roll or search through the bag at my feet. They need to be ready instantly and be able to drop right back into place. So I created: The Armrest Project Organizer

Materials:

Approximately 2 yards of top fabric for sling top and pockets
1 yard muslin or backing fabric
lightweight interfacing
thread
ruler

First things first, measure your couch. I went from outside in, first measuring the drop on the outside of the arm, then the top of the armrest, the drop inside the armrest, and across the bottom of the couch under the cushion.


Also measure the distance front to back for the depth you want.


My measurements were 10" outside drop, 8" top of armrest, 13" inside drop, and 21" across the bottom. The width was 18" across. Add 1/2" to all of your measurements. I'll be referring to my measurements throughout, but please substitute your own measurements for mine. 

Cut from top fabric

1-18.5" x 21.5" (bottom)
1 - 18.5" x 13.5" (inside drop)
2 - 18.5" x 8.5" (top of arm/pocket)
2 - 18.5" x 10.5" (outside drop/pocket)
1 - 18.5" x 5.5" (pocket)

Cut from muslin or backing fabric


1-18.5" x 21.5" 
1 - 18.5" x 13.5"
1 - 18.5" x 8.5"
1 - 18.5" x 10.5"

Cut from interfacing for pockets

1 - 18.5" x 8.5"
1 - 18.5" x 10.5"
1 - 18.5" x 5.5"


  1. Using 1/4" seams, match the sections to each other, right sides facing. Outside arm to top of arm, top of arm to inside arm, and inside arm to bottom. You'll have one long piece of fabric x the width you chose. Iron all seams open. 

  2. Do the same with the muslin or backing fabric. I chose to cut these in sections so that they would hang better on the couch. You could also do one very long piece of each fabric if you choose.
  3. Iron on interfacing to the 3 pocket sections. Turn the top edge of each pocket under 1/4" and stitch down to create a narrow hem. 
  4. To do the pockets, decide how many sections you'd like. You'll only be able to section one of the pockets in this, and I chose to do the middle pocket. I made one 6" section and three 4" sections. I matched the edges of the bottom and sides to the longer (10") inside section and sewed straight lines from the top of the middle pocket to the base, then sewed a 1/4" seam around the sides and bottom. 
  5. Layer the bottom pocket to the other two pockets and sew around all three thicknesses. 
  6. Match the main fabric to the muslin, right sides together, lining up seams and edges, and sew 1/4" seam all around, leaving an opening for turning. 
  7. Clip the corners and turn the piece right side out. Iron flat and top stitch around seam allowances. 
  8. Attach to armrest by laying long piece under cushion and over the top of the armrest. 
TADA! You now have a beautiful, one-of-a-kind armrest project sling. You can use this for any type of craft such as knitting, crochet, needlepoint and much more. You can also use it as a handy remote control holder or a candy bar stasher. I hope you had fun with this and as always, if you make one, please post it to our Flickr group! 

Tuesday, January 21, 2014

Tuesday Needlework: The difference between crochet and knitting

Have you ever been quietly enjoying your coffee (tea, latte, frappe, insert beverage here) in your favorite coffee shop while working on your current crochet project, dressed in your awesome asymmetrical cardigan and slouchy hat (that YOU made, btw) only to have some person obviously uneducated in needle arts come up and ask you, "What are you knitting?"

As the hair on the back of your neck raises and you feel your blood start to boil, you ever-so-patiently take a sip of your beverage with the cozy on it that YOU crocheted, look up and say, "I'm not knitting. It's crochet." And inside your head you're thinking, "If it was knitting I'd have two needles to jab you with." Yeah, don't act like you've never thought this a time or two. 

I pursue both knitting and crochet because I find they have their purposes for different items. I don't necessarily like to make clothing such as sweaters from crochet, but that it is great for scarves and hats.It is too bulky for my taste preferences.
Crochet stitches for a hat

Knit stitches for a hat

I have made cardigans and such, but as for sweaters, gloves, and socks I just think the stitches are too big and it looks too "homemade." Before you string me up, remember, this is just what I feel about it and that I have nothing against homemade. I think knitting has a smoother look and the closer stitches make for a much more appealing fabric for clothing. 

However, if you want something done faster, your best choice is crochet. I can work up a crochet piece in half the time it takes me to knit something. This is also because the stitches work up about twice the size of a knit stitch. I think it may have a lot to do with only using one hook as opposed to two needles, too. 

So what is the major difference? Well, if you do one or the other you probably already know the answer to this. I'm hoping to reach out and educate those that may not know, and hopefully one day the world will be a much better place when the two are not confused, inciting violence in the mind of an otherwise peaceful needleworker. 

If you take the time to notice, crochet is performed using a single needle with a hook on the end of it. The crocheter is usually in a very rhythmic trance with yarn in one hand and a hook in the other. Knitting uses TWO needles. These needles DO NOT have hooks on the end of them, but are rather sharp and pointy. The knitter will also have a rhythm down but it will not be the same as the crocheter's.


Interrupting a crocheter usually means you will interrupt their counting. This is not a good thing. If they sigh audibly and visibly start counting stitches with a louder voice (not the voice inside their head) you had better back away slowly and never, ever speak to them again. To repeatedly ask questions is not wise. 

The same could be said for a knitter, except that for some reason they have a tendency to use stitch markers more often and once they are sure of their stitch count, rarely have to repeat counting. This is not a guarantee, though. Ask yourself, "Do I really want to mess with or upset someone that can use sharp, pointy objects with obvious skill and grace and how much does she/he really value that yarn they are using? Would they mind a bit of blood?" 

If you feel you MUST talk to the knitter or crocheter while they are working, it is best if you sit patiently and watch them work. You may pick up a thing or two in the process. When they stop their hand movements to take a sip of their beverage, it is probably safe to talk to them. Hopefully you are intelligently armed with the correct question of, "What are you knitting/crocheting?" If you get it right, the needleworker is usually more than happy to speak with you about their project. 

I hope this has reached someone in time to avoid serious injury. If, however, you are sitting in a hospital bed with puncture wounds and reading this, I hope that at your next encounter you will be better informed. Cheers, and quick healing...


Friday, October 4, 2013

New Technique ~ Guest Blogger

HI! My names Ashley, I am here to tell you about my fabulous new technique that I tried out today/ I told my good friend Tammy about it and she suggested blogging about it to share, and HERE I am!!! A little bit about myself first, (kinda to credit my skills maybe?). I am the owner of a very small business called "SEW Stitches",  I sell handmade crochet, knit, and sewn items. I started it about 2 years ago, it has had 3 names, and SEW Stitches kinda just stuck since I do 3 different "types" of sewing (you all know what I mean lol). 

So back to the nitty gritty! I make oodles of hats with appliques on them in the winter and some of you will know what I'm talking about when I say this.. but it takes WAY TO LONG to hold eye balls and sew them on and PRAY they are in the right spot!!! 

Well I have been dreading the coming hat season because of this horrid applique issue, and one day while organizing all my quilt supplies and what nots on the craft table.. I got to thinking... WHY NOT USE BASTING SPRAY ?!?!!? Sooo this is how my new technique tutorial was born!!!! I have a few pretty not so pretty pictures for you! It was late and dark but you will understand! 

First! You will need your handmade items (I am using a hat for my daughters birthday present and she asked for a flower applique), basting spray (this is found with quilting supplies at walmart, hobby lobby, any craft store will have it!), something to put behind you so the spray doesn't get on your table (I didn't use anything in the pictures because I normally do it outside), scissors, and a needle to sew in the yarn. 


Second, you will select the part of the applique that you would normally sew onto the hat and get in your mind where your applique will be placed. I like my flowers to be a little free, so I only sew the centers on, but with eyes and noses you would sew the entire thing on so you wouldn't need to select a SPECIFIC part. 


Now you will very carefully spray the smallest amount of basting spray onto the selected area. Please be very patient and BARELY touch the nozzle, because this stuff sprays fast wide and is VERY sticky and hard to get off! So just gently tap to spray and do it in little spots. (Remember you are sewing this so the spray doesn't have to be your PERMANENT glue, you wont need much to hold it in place for 10 minutes while you whip stitch around)


Now that you have your basting spray applied your going to put it on the spot you want it to be PERMANENTLY PLACED! Once you have placed the appliqued piece on your hat it will be sticky, so moving it as little as possible is best!!!! 
Now VOILA!!! whip stitch, sew, or however you normally attach your applique around without having to re-position a million times and pray that its in the even position you aimed for!! 
Normally I would show you the finished hat, but I have not finished it as its midnight and I have a party to plan and a dress to make for the birthday girl! Sooo I will share another hat finished using this technique, it was actually the one I tested this technique on!


Any questions, comments, or what not please be free to ask!!!! You can do so here.. OR.. I would LOVE for you to *Like* my page on facebook and share with all your friends and family!! Thanks for taking time to read my tutorial, hope you like it, learn something, or that it helps you in someway!

https://www.facebook.com/pages/SEW-Stitches/451950041492278


Friday, June 7, 2013

Knit in Public Week

It's time to knit out loud! June 8-16 is Knit in Public Week. We're encouraging all of our crafty friends that love to knit (or crochet!) to get out there and knit in public. Tell people what you're doing, share your craft, and invite questions. Sure, you may be counting, but if someone is interested enough to ask questions, write down your count and answer them. They may be joining you one day. Knitting is one of those crafts that draw people in and get them hooked when the discover the possibilities. Little kids' eyes will grow huge when they see someone using 4 (or more) needles to knit in the round. To them, all those spiky rods are cool!

So come on, don't be a prude. Gather your knitting friends, hit the local coffee shop, fast food resty, book store, park - wherever, whenever - and knit out loud!


Thursday, January 31, 2013

My dog ate my Knook Hook

No, really, seriously. I recently wrote about my new knooking adventures and our new dog, Brownie. Well, the combination of the two was catastrophic. Brownie is a mess. I pretty much knew what I was getting myself into when we adopted an Australian Shepherd. I knew they were full of energy, needed constant stimulation and play, and if not given those could become destructive. But I am seriously at a loss with this dog. We're going to try to train him with an invisible fence and get him outdoors, where I can spend some time teaching him to use an agility course. Until then, however, we're making do with trying to keep him entertained indoors. We live near a busy highway, even though we out in the country, and we have a few neighbors. Our closes neighbor has some goats. I'm afraid if he gets loose without a fence, we'll have a lawsuit or a dead dog. Any previous or current Aussie owners that would like to give some feedback or support are more than welcome to!

So, Brownie gets bored. And I left my size H hook sitting on the end table, innocently attached to my current project. I took a shower, Brownie tried to knook, couldn't do it, ate it instead. Bye, bye, knook hook. So while I COULD HAVE knitted the piece that the hook was attached to, I casually put it to the side and bought a new and improved set. This time going for the deluxe set that came with more goodies, hooks, projects, and instructions.
Knook Deluxe from LeisureArts.com

It was an excuse. I know. I have also started a new charity organization called, "Warm up the Boro." Basically, I'm teaching others to knit and crochet in exchange for their contribution of a hat or a scarf to be donated to those in our community. Statesboro isn't a big city, and being nestled in the south we don't have A LOT of cold weather, but when it gets cold, it really gets cold. Anyway, for more information on that, please go to http://www.warmuptheboro.blogspot.com . I can currently only teach in my area, but I'm hoping it will spread to other communities too. Maybe even yours?


Monday, January 16, 2012

A step in the right direction

When I really began crocheting in earnest, I started collecting yarn and patterns. At first, it was an innocent hobby. I discovered new yarns that weren't available in my local store. I had to have them, touch them, use them. I went yarn crazy. The patterns became organized on CDs and in filing cabinets. Then the pamphlets required binders with clear pockets to keep them organized. Eventually I had enough of these and books to fill up a bookcase. That was just the beginning.

Being a dedicated Eclectic, I found interest in other crafts. Knitting still required yarn, but new notions, needles, patterns, and books were also in order. Then came some sewing projects. These required fabrics. Yummy, delicious, colorful materials in solids, prints, and patterns that just needed one or two other matching fabrics. And of course, there are ribbons, rick-rack, pins, needles, bobbins, thread...books... you see where this is going.

Quilting required even more books and fabrics and a recent acquisition of said products from another crazy quilter left me with boxes filled and no place to put these wonderful treasures. Of course, I also didn't want to get rid of any of it. This is a sickness that crafters share, creating an idyllic world where they have all supplies on hand so they may continue to craft until they drop.

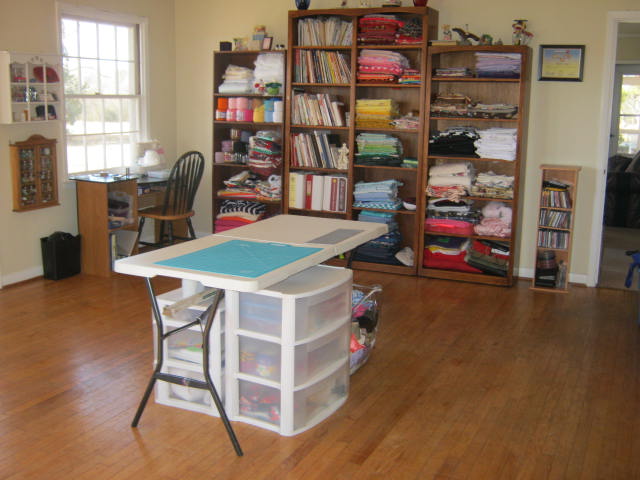
Our recent move not only lifted my heart and spirits, but it also gave me a craft area separate from my sleeping area. An entire room, dedicated to what I love. So after putting away the requisite things in the kitchen, living room, bedroom and bathroom, I got to unpack my sewing room. And I decided that now was the time to organize! It's been more than a week, and I'm almost done. But the rewards are decidedly worth the time and effort. Here is a sample of the fabric shelves:


I have also sorted through all of my sewing notions, eliminated two of the peg boards that were major eyesores, replacing them with storage containers in a cleaned out sewing desk. I do still have one peg board, but that has gone down from the 3 that I previously had that never really worked. 


The sewing machine, jewelry desk (yes, another obsession), and cutting table all have their little areas. I even have room to add a quilting rack if I ever decide that I want to hand quilt. 


I can't wait to get in and finish a couple of quilts and work on some other projects. I haven't even been to my local Hobby Lobby in the last few weeks; probably because of the move, the unpacking, and organizing, but it still counts. Of course, I have the garden coming up in a couple of months, and I'm collecting for that, so I may need some more bookshelves for the books. But we'll take this one step at  a time. :)

Friday, May 28, 2010

IKnitQuiltSew - HAF Blog Ring Feature

Being a knitter, sewer, and crocheter myself, I can recognize talent when I see it. This week's featured artisan is IKnitQuiltSew from Handmade Artist's Forum. Her talent is immediately recognizable in her work. While browsing her studio on Etsy, I was so impressed by the arrangement first of all. Her baby items are arranged so attractively by color, so it is not hard to find matching sets for your little one!


Secondly, she gives you these adorable little baby dolls and teddy bears that are practically irresistable.


My babies are growing up and out of the teddy bear and doll baby stages, but they are so great I might just get one for myself. Where I really fell in love, though, was with her Baby Quilt/Wall Hanging. Quilting is a time-consuming, labor intensive act of love, of which I have done once in my life! I know why they are so expensive, but I have never been drawn to one enough to say that I would buy one. HOWEVER... this quilt spoke to my heart.

Welcome Home Quilt
Notice the details


When that happens, I start thinking how will I get the money for this??? It's not really that expensive, though. Only $150 for this beauty. But with my 5 kiddos I have to carefully gauge each and every dime. This quilt, though, echoes the desires of my heart - a home of our own. We've been wanting a home for the last 12 years of our marriage, somewhere our kids can come back to with thier own families eventually. We've had heartbreak after heartbreak, but the dream still lives. This would make a beautiful "Welcome home baby" quilt or housewarming gift.

IKnitQuiltSew has a blog that showcases more wonderful artisans from HAF. She let us all know that she is recovering from surgery on her rotator cuff. Anyone that knits, quilts, or sews knows the challenge of not having your primary arm available for your craft. Her tenacity and love for her art shows through again, though, because she is still knitting. Albeit slowly - but still knitting!

 I have thoroughly fallen in love with IKnitQuiltSew's creations and am just tickled that I can bring them to you through the HAF blog ring.

Craftsy

Craftsy

LinkWithin

Related Posts Plugin for WordPress, Blogger...