Welcome!

I craft! Spinning, sewing, knitting, quilting...it's all here, along with so much more. I just love making things and writing about them. I hope you'll join me.

Craftsy

Craftsy

Search This Blog

Showing posts with label Wednesday Quilting. Show all posts

Thursday, March 27, 2014

Quilting on Wednesday: April Block of the Month Prep


Good day, lovelies! I hope you are having a most excellent week. How about some preparations for our April Block of the Month? I know! Can you believe it is nearly April already? I can't. It's too cold here for it to be spring, which seems to be the sentiment across the country.

Nevertheless, we are here, it is spring, and we are going to do an April block of the month.

This month we are going to do "Church Windows" and you will need the following supplies:


Church windows uses hexagon templates, so we will use Y seams like we did in Attic Windows. We will also use 1/2 square triangles. This block is intended to also have a stained glass effect, with darker strips between marbled centers and coordinating outsides. However, I always encourage you to use your imagination and see what you can come up with!

Oh, and I have A SURPRISE for all of you. Next week's blog should also feature a video for this square. That's right, I'm coming up in the world and bought a camcorder and a tripod. So you will get to see everything as it is done. Hopefully this will be a more permanent feature for the blog.

I hope to see you there, and hope you join me on this journey

Thursday, March 6, 2014

Quilting on Wednesday: Block of the Month 2

This month's Block of the Month is the Box Quilt block by Marcia Hohn of the Quilter's Cache. It is a 12" block that I think is complimentary to our attic windows block and a little on the challenging side for some of us. It uses flying geese blocks that for some reason have a really horrifying reputation. But I think they're fairly easy to do and look really great when incorporated into a quilt.


To start with, find your pattern at http://www.quilterscache.com/B/BoxQuiltBlock.html and go to the second page for the fabric requirements. The longest strip is only 14", so fat quarters and scraps will work just fine. You will need 9 different colors of fabric. Eight of your fabrics will be 4 sets of complimentary colors in different hues. For example, my colors are dark pink, light pink, dark orange, light orange, dark yellow, light yellow and dark green and light green. The ninth color should be white.

We will use scant 1/4" seams throughout the entire block. It is also a really good idea to mark your colors on the back of your colored pieces using 1-8 and a water soluble marker. This will help you to avoid confusion if you use colors different than what the pattern calls for.


Begin by cutting your strips in the dimensions listed on page 2 of the pattern. For the colors that require both an 8 1/2" and 4" by 2" strip, I just cut mine 12 1/2" x 2" and then cut off 4".

Once you have your strips cut, the directions say to cut each of the 8 1/2" strips into one 5" and one 3 1/2" strip. To do this and save time, I carefully lined up all of my 8 1/2" strips and cut them all at one time on the 5" line.


Use the same method for cutting your 4" strips into 2" squares and your white background strips into 3 1/2" squares. 

4" rectangles cut into 2" squares

All the cut pieces
 Once everything is cut, we get to start sewing our boxes! Start by sewing your 3 1/2" color 1, 3, 5, and 7 each to the right side of a white square.

3 1/2" rectangle on white square, right sides together. 
Then sew the corresponding 5" strip to the bottom of the white square and the 3 1/2" strip.

5" rectangles sewn to bottom of white squares


Alright, the easy part is done! Now to make the flying geese units. 

Start by matching one of the 2" squares to the left side of a white rectangle. 


Then mark a 45 degree angle from the top left corner to the bottom left corner of the square. 

Mark the 45* angle
Sew right on the line you marked, then trim off 1/4" seam allowance and press the seam to the dark side. 
cut off 1/4" seam

with 1/4" seam
Do the same procedure of marking, sewing, and cutting with the color 3 square on the opposite side of the unit you just finished. Looking from left to right you will make one color 1/3 unit, one color 3/5 unit, one color 5/7 unit, and one color 7/1 unit. 

Make 4 units

Now piece your squares together so that all of the colored sections are in the middle of the block and are in corresponding sequence of 1, 3, 5 and 7. 


Turn all square units to the middle to form a cross
Sew them together with a scant 1/4" seam and press.


Using colors 2, 4 6, and 8 we will make rectangles to fit along the top, bottom, and sides of our cross unit. 

Begin by placing your color 2 and 8 units next to your 7/1 flying geese unit, matching up corresponding colors (1 to 2 and 7 to 8) using your short 3 1/2" rectangles. Sew these with a scant 1/4" seam allowance. Do the same with the opposite side using the 4 and 6 colors on the 3/5 unit. 

Match the remaining long 5" rectangles to the 1/3  and 5/7 units on the top and bottom of the block. The centers of your flying geese units should line up with the colors of the cross. 

Top section using color 2 and 4 on 1/3 flying geese unit
Sew the side sections to the sides and then the top and bottom sections on. That finishes your block! Trim if needed. If you have any questions please comment below. Don't forget to upload your finished blocks (giving credit to Marcia Hohn for the pattern as described in our first BOM) to our Flikr group. 


*I have a couple of mistakes in my block! Proving that I AM human and learning right along with you all. Can you find them? If you do, please comment below and tell me what you've found! 


Wednesday, February 19, 2014

Quilting on Wednesday: Block of the Month Prep 2

It's time to get ready for our second Block of the Month! We will be working on the Box Quilt Block from Quilter's Cache. All the same rules apply for posting of pics and giving credit. This is a traditional block, 12", that can be made using era appropriate fabrics or modern fabrics.

You will need:


  • 9 different colors of fabric - fat quarters will work great! 8 of them should be 2 colors that match, with slightly different tones. So 1 light purple and 1 dark purple, 1 dark yellow, 1 light yellow, etc. For a better explanation and variation see the link above for images. 
  • cutting mat
  • rotary cutter
  • thread
  • sewing machine
This block has a similar 3-pin rating from Quilter's Cache as our last one did, however Marcia has reformatted the block to take out inset seams. You'll get to practice making flying geese units! 


Wednesday, February 5, 2014

Quilting on Wednesday: Attic Windows Quilt Block Tutorial

A couple of weeks ago I mentioned we were going to do a 2014 Block of the Month. This is our first edition of the BOM. We're doing an "Attic Windows" block. I figured there are plenty of tutorials on doing basic four and nine patch blocks, and some people might want a little more meat. This is rated 3 pins on Quilter's Cache and will make a 12" block. All of the blocks we'll be attempting are 12" blocks, so they'll come together to make a nice little 36" x 48" quilt.

For this block you will need: 


  • Pattern from Quilter's Cache
  • 3 fabrics: 1 dark, 1 medium, and 1 light colored
  • graph paper (or regular typing paper) 
  • pen
  • paper scissors
  • rotary cutter
  • rotary mat
  • matching threads
  • ruler with 1/8" markings
  • chaco marker or water soluble marking pen
I chose to go with orange, because it is my favorite color! I have two that are patterned, but they vary well from light to dark in tone. 


You will need to print out the templates from Quilter's Cache. If, like me, you run into problems getting them to print out correctly, she has the dimensions marked on the template and you can simply draw them onto graph paper. If you want a more permanent template you can trace around the drawings on template plastic and cut those out. Make sure your measurements are accurate and you measure your print out. Mine were way off by 1/4" and I couldn't get my printer to scale them properly. It's really not necessary to make the 3 1/2" template, but I did just to show you. 


Cut: 

1 - 3.5" x 14" strip from the darkest color
1 - 3.5" x 24" strip from the medium color
1 - 3.5" x 24" strip from the lightest color

Cut the 3.5" x 14" strip of the darkest color into four 3.5" squares. 


Lay the trapezoidal piece on the medium color strip, mark, and alternate the trapezoid so that you end up with a rectangle. Cut 4 trapezoids of the medium and of the light. Reverse the direction of the trap as you see in the pattern on page 1. 


For the next step, she has us marking a point 1/4" from the corner of the 3.5" square and the miter of the trapezoid. Instead of making a single point, I marked 1/4" on the reverse side of the fabric for each side that would be sewn. The stopping point is where the two lines meet. 


Line up one square with the 3.5" side of the trap and sew a scant 1/4". A scant 1/4" means that it is just outside of the 1/4" line. This way, when you press out your seam you don't lose that little bit of material and have exact 1/4" seams, making your block come out even! You can see on my machine that even though I have a 1/4" piecing foot and a needle setting to match it, I use a rubber band that sets just outside my 1/4" and a regular foot. I find this is more accurate than the 1/4" foot that I have. 


Line up your needle so that you are a scant 1/4" from the line and sew just down to where the lines meet or you have placed your mark. Here she also says to press to the middle. I found that this was a little troublesome in getting my second part to match up, so I didn't press it immediately. Maybe I'm wrong, but it worked. 

Line up your second trap with the inside edge of the first one. You can lay them out so that you can see how they should fit together. Again, mark your 1/4" and sew just to where the points meet. Now you can press. 


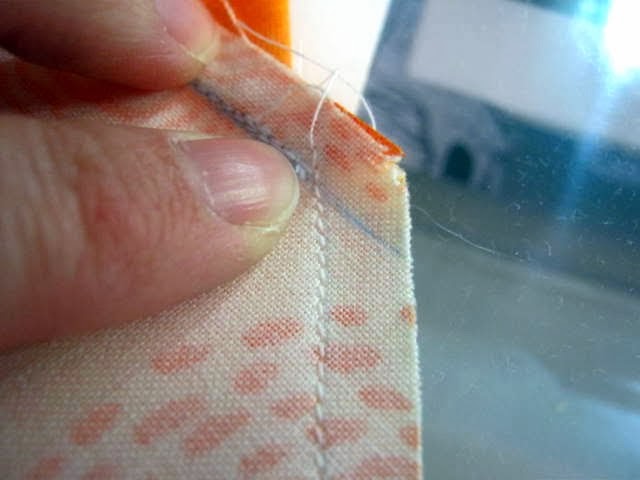
Now is the final meeting of all points! Pull your square out to a point and line up the seam lines you've already sewn and the other 1/4" seams of the unsewn sides. Place your needle on the outside of the sewn seams where you stopped and stitch another scant 1/4" seam down the final side. 


That's it! Press it out and you have actually made part of your attic windows block. Make 3 more exactly the same and join them together! Isn't your block lovely? Aren't you proud of yourself? You made an attic window block AND tackled the dreaded Y seam. And to be very honest with you, this is my first time ever making this block. Yes. I've never done a Y seam either. So if I can do this, so can you. 


Please make sure you post your pictures of your finished blocks (even if they're not perfect) to our Flickr group! I'd love to see what you have done. Please make sure to caption your pictures with credit to Marcia Hohn, Quilter's Cache, and name of pattern. 


Wednesday, January 29, 2014

Quilting on Wednesday: Preparing for 2014 Block of the Month

We are one week away from the 2014 Block of the Month! I hope you have your supplies gathered and have visited the website. If you haven't heard what we're doing yet, visit the link above. We're building an attic windows block, which I hope will be a bit more advanced than a four or nine patch, a little challenging, but not overly so.

I plan to continue working on the skill builder series for our Wednesday quilting posts. I hope you will join in with me, as we both learn!


Wednesday, January 22, 2014

Quilting on Wednesday: Using Alternative Stencils and Templates for FMQ

Free motion quilting (or FMQ) is my favorite type of quilting. It's like drawing on fabric! Very often, I like to create my own templates and stencils. Leaves, flowers, drawings, and internet images are all great sources of inspiration. Recently I finished a quilt for a young couple that had attended the same college and participated on the rowing team. They are now engaged and the girl's mother had me make a quilt for them using their rowing team tees.

I put a lot of effort and time into this quilt, adding things like half square rectangles and half herringbone borders. I also had to figure two different dimensions - one side using her tees and the other side using his. Of course, none of the tees were the same size and most of his had small images for the chest or pocket. I also bound the edges using long strips of blue and orange. This is what happened:
Her Side

His Side

The sun was shining full on that day, so I got show through, but I did use a nice cotton batting between the layers. The quilting on this didn't settle in my mind until the very last minute. I couldn't do stitch in the ditch because it wouldn't look right on the other side. I also didn't want to do a basic lattice design because I'd done that on the last 3 quilts and was sick of it. 

I wanted to do something that represented the waves or ripples in the water when rowing. I also needed a stencil but didn't want to go to the store to get one, being disappointed when they didn't have one. I was two days from deadline, so ordering one was out of the question. Printing one out, tracing it, marking with the pounce - all took too long. So I started looking around the house for something to use. I was thinking something like a birthday banner. 

Going into my kids' room, I found an old paddle ball paddle that the ball was detached from. That was it! I traced it out, matching top to top and bottom to bottom, turning it back and forth to get a wave. I spaced it a couple of inches apart, and repeated the marking. 


I think it turned out very well and my customer was extremely pleased. There are so many possibilities for making quilting stencils our of everyday household items. I hope this inspires you to come up with some too! 


Wednesday, January 15, 2014

Quilting on Wednesday: Block of the Month 2014

Who would like to do a Block of the Month??? Yeah, some of us get into doing these things and find out that we love them. Blocks of the month increase our skills and knowledge and provide us with little bite-sized pieces that don't necessarily have to develop into quilts. You can use your blocks to make a variety of things like pillows, pot holders and hot pads, mug rugs, etc.

We will be doing one block a month, on the first Wednesday of the month. So our first one will start on February 5, 2014.

Our first block will be an Attic Windows block that measures 12" x 12". You will need:

Supplies: 


  1. 3 different fabric colors; 1 light, 1 medium, 1 dark in the same scale. (For example, if I want blue, I would choose 1 dark blue, 1 medium blue, and 1 light blue. They can be patterned or solid, your choice. ) 
  2. Rotary cutter
  3. Cutting Mat
  4. Sewing Machine
  5. Thread (matching is recommended but not necessary. I generally use white.) 
  6. Pattern downloaded from website
I will be using my Janome MC8900 and hopefully will be able to show you on video some of the features of this machine. We will also be using block designs from Marcia Hohn's Quilt Cache website. Her patterns are free to use and download, but you cannot sell anything made from her original designs. Remember, these blocks are just for practice anyway! If you post images of your blocks made from any of her original designs that we make, you must include this information: 

Name of the Block as it is on the website
Include website and Martha Hohn's name

I am going to try to stick with traditional designs for now. 

Ok, so you have until February 5, 2014 to get the fabric and necessary supplies before we start! I think this will be a lot of fun and I hope to get a lot of participation. 


Craftsy

Craftsy

LinkWithin

Related Posts Plugin for WordPress, Blogger...