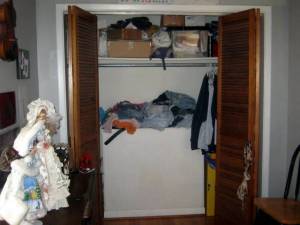
Last week I wanted to blog about my adventure in expanding my overly small bedroom closet. My closet is in the smallest bedroom of the house. Inside the closet, is a fireplace. No, not the front of it, but the entire back of it. It is actually a faux fireplace which faces my craft room. Made of marble, concrete, and plaster, it's not something that can be removed to make closet space without contractor! So I needed another solution.
It didn't work out as planned, but I DID get a few things done to it. The big plan was to move the closet rod to the outside of the closet and hang the clothes in front of it. I didn't really want a big metal rod hanging there with all of the clothes out in the open. The serenity of my bedroom is something I thoroughly enjoy, but this was not conducive to that serenity. So I was also going to put a curtain in front of the clothes. Simple, right? Well, as I explained in the previous post, it wasn't all that simple because I didn't allot enough time, nor did I have all the proper materials ready. *Sigh* This is the bane of many DIY projects.
But I DID have a plan, and I wanted to finish it. First of all, I needed curtains. So what does a crafty sewist do? Ah, yes, I'll make them. And I did. I measured top to bottom and used a 60" wide piece of off-white cotton lining I had bought to reupholster a couch. (Couch left, meaning I had 10 yards of this stuff available.) I cut and sewed them, making a simple header style curtain that could have grommets.
Then I started looking at all of these beautiful curtain panels online. You know, the ones that cost well over $100 each? They were embroidered and woven with beautiful scenes. My plain white curtains just didn't measure up. I decided to paint my curtains. I played it smart this time, though, and made a sampler to try out some techniques.
Using the "make cherry blossoms with a soda bottle" pin as inspiration, I tried using the method they had. Ok, soda bottle didn't work out so good. The ones I had, made flowers with spaces way too wide between the petals. So I took out my paint brushes and made little circles with them. Then I added some other colors to the branches and flowers, to see what I like best. Getting a little input from the husband, we went with the pink blossoms lined with a dark pink shade. Now I also had a painted panel I could frame and use to decorate the room! Yay, me!
A couple of days later I laid out my curtain panels and began to decorate them like I had the test sample. Not only was it fun, but I felt really good with paint on my hands and the smell in the air. I used acrylics with a little bit of water. The paint did seep through the fabric a bit, but I had covered the table with some craft paper beforehand. Once it had dried, I pulled it up. It stuck just a little bit, but no big deal.
Here are some progression pictures for you:
I love how they turned out! I put one across the bed to let it continue to dry, and instantly decided I needed a quilt that matched. One thing leads to another, and I have plans for my first painted, whole cloth art quilt. I love DIY.


No comments:
Post a Comment
Thanks for your comments! I try to respond to each and every one. Please note that all comments are moderated and it may take a little while for your comment to appear. :)